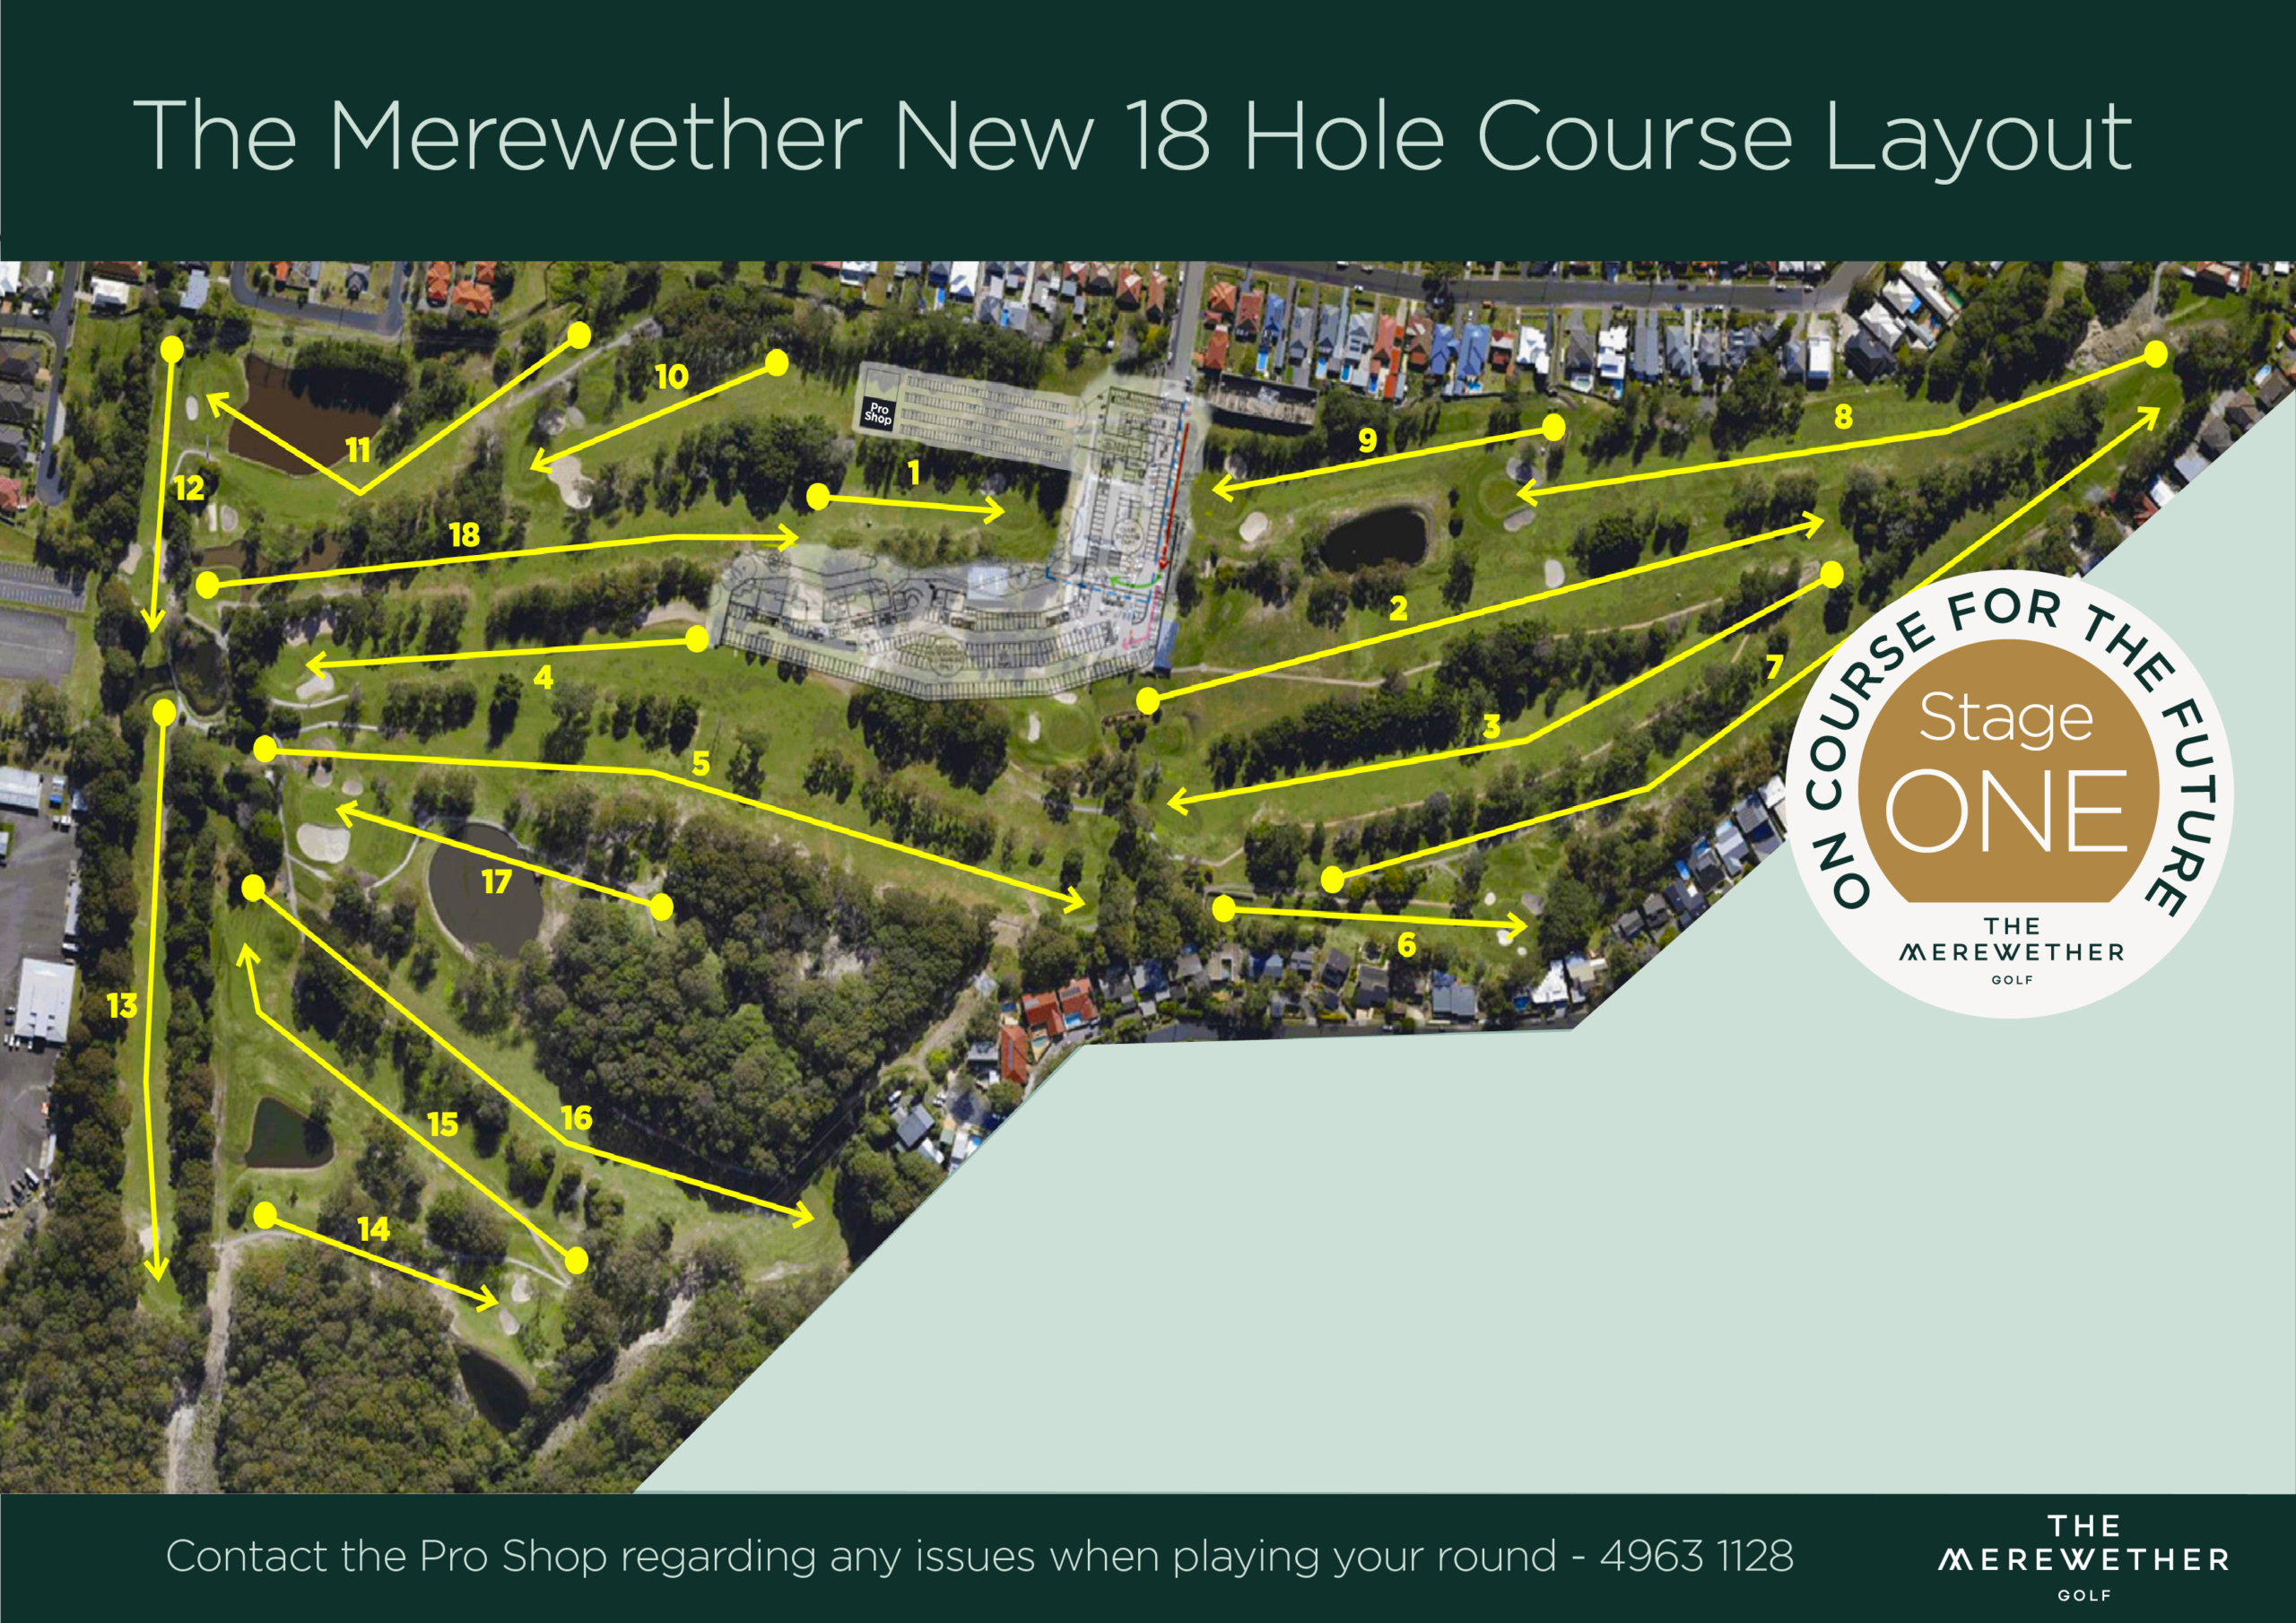
Hole 1
95m – Par 3
Hole 2
443m – Par 5
Hole 3
390m – Par 4
Hole 4
255m – Par 4
Temporary par 4 while green construction works are completed. Challenging drive to keep it on the fairway. Green is well guarded on both sides with bunkers. Over the green is a hard chip shot back onto the green.
Hole 5
462m – Par 5
Uphill par 5 that usually plays into the prevailing north easterly so therefore plays longer than it’s length. Fairway slopes right to left for the full length of the hole which makes it difficult to keep the ball on the fairway. The green is a long but thin green that has no bunkers. But don’t miss the green left.
Hole 6
146m – Par 3
One of the best par 3’s in Newcastle. Long but narrow green that is well guarded by bunkers on right and on the left of the green is the valley where double bogey’s are often made. To add to it’s difficulty, it often plays into the prevailing north easterly.
Hole 7
475m – Par 5
Dogleg left par 5. Tee shot is very narrow and requires a right to left shape around the dogleg. Hole slopes from right to left and has OUT OF BOUNDS on right from tee to green. Green is very narrow but long and flat. Don’t miss the green on left side, as it is very hard to get up and down.
Hole 8
388m – Par 4
One of our best par 4’s. Downhill that requires an accurate tee shot with OUT OF BOUNDS on the right and left is well guarded by trees. Second shot is also downhill to a green that is guarded by bunkers on both sides. Keep your second shot below the hole as the green slopes sharply from back to front.
Hole 9
168m – Par 3
Hole 10
105m – Par 3
Hole 11
273m – Par 4
Hole 12
115m – Par 3
Hole 13
309m – Par 4
Hole 14
159m – Par 3
Hole 15
300m – Par 4
Hole 16
373m – Par 4
Our signature hole. Long uphill par 4 with a slight dogleg left. Tee shot must be right of centre. Anything going left will make it impossible to reach the green in two. The second shot is to a wide but narrow green and is guarded by a steep drop-off before the green. Add one to two clubs for your second shot, being long is better than being short.
Hole 17
192m – Par 3
Long downhill par 3 over water. From the back tee over 190 metres to a long but narrow green guarded by bunkers on both sides. Like the 13th hole, always seems hard to work out the direction of the wind.
Hole 18
321m – Par 4
Straight away par 4 that requires a tee shot down the centre. Playing to a temporary green with internal out of bounds nearly running the entire length of the hole. Precise approach shot is needed.
